

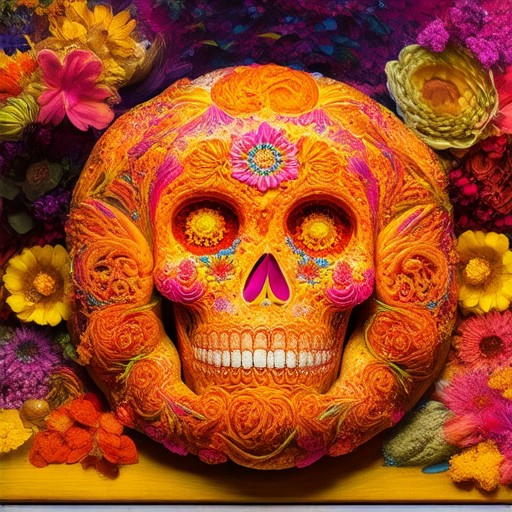
The Day of the Dead is a vibrant celebration honoring loved ones who have passed, and what better way to mark this occasion than with a delicious and visually stunning centerpiece? Crafting colorful Day of the Dead bread can elevate your celebration, turning a traditional dish into a work of art. Whether you’re a seasoned baker or new to the craft, this guide offers expert tips and tricks to create a loaf that’s as beautiful as it is flavorful. From understanding the essential ingredients to mastering techniques that bring vibrant colors to your dough, we’ll explore everything needed to make your Day of the Dead bread stand out. Discover the secrets behind achieving rich hues, the importance of traditional methods, and how to incorporate unique flavors that pay homage to this meaningful holiday. With our comprehensive approach, you’ll be equipped to create a memorable and colorful Day of the Dead bread that dazzles and delights.
Key Takeaways
- Master Essential Ingredients: Craft vibrant Day of the Dead bread with wheat flour, butter, sugar, active dry yeast, salt, anise seeds, and orange zest for authentic flavor.
- Follow Step-by-Step Preparation: Gather ingredients, knead dough, shape into traditional forms, and bake to perfection for a festive treat.
- Achieve Vibrant Colors: Use food dyes or natural ingredients like beetroot for purple and turmeric for yellow, ensuring safe and effective coloring.
- Shape and Decorate Traditionally: Create pan de muerto or sugar skulls with cookie cutters and enhance with sprinkles, edible pearls, and gold dust for a striking display.
- Bake to Preserve Color: Use proper baking temperatures and techniques to maintain vibrant hues without fading.
- Enhance Flavor with Tradition: Incorporate anise or cinnamon for a rich, aromatic twist, or sweeten with honey and powdered sugar.
- Troubleshoot for Vibrant Results: Address issues like fat content, powder ratio, and storage to achieve colorful bread effortlessly.
- Use the Right Tools: Equip yourself with comals, mixing bowls, and baking trays for professional results.
- Serve with Complementary Dishes: Pair warm bread with coffee or traditional desserts for a complete celebratory experience.
- Apply Expert Tips: Experiment with colors, shapes, and decorations to create unique, eye-catching bread for your celebrations.
How to Create Colorful Day of the Dead Bread
Follow this step-by-step guide to craft vibrant Day of the Dead bread, a traditional and festive offering for your celebration.
Ingredients:
- 1 ½ cups all-purpose flour
- 1 ¼ cups sugar
- 1 teaspoon instant yeast
- 1 teaspoon vanilla extract
- 1 tablespoon orange zest
- 1 teaspoon ground cinnamon
- 1 cup warm water
- Eggs (as needed)
- Vegetable oil (for greasing)
- Natural dyes (beetroot powder for purple, turmeric for yellow)
- Colored sugars and edible glitter (optional)
Instructions:
1. Prepare the Dough
- Mix the dry ingredients in a large bowl: flour, sugar, yeast, vanilla, orange zest, and cinnamon. Add the warm water and mix until a dough forms.
- Knead the dough on a floured surface until smooth, about 8-10 minutes.
- Let the dough rise for 1-2 hours or until doubled in size.
2. Color the Dough
- Lightly grease a large baking sheet or line it with parchment paper.
- Add a few drops of natural dye to the dough and mix until evenly colored. Start with small amounts to achieve pastel tones.
- For more vibrant colors, dust with colored sugars before shaping the dough.
3. Shape the Bread
- Divide the dough into smaller portions and shape them into skulls, skeletons, or flower shapes using cookie cutters or your hands.
- Place the shaped dough on the prepared baking sheet, leaving space between pieces.
4. Bake the Bread
- Preheat the oven to 375°F (190°C) and bake for 20-25 minutes, or until golden brown.
- Check halfway through baking to ensure even coloring.
5. Decorate and Serve
- Allow the bread to cool slightly before moving it to a serving tray.
- Garnish with colored sugars, edible glitter, chocolate chips, or dried fruit.
- Arrange with marigold petals or candles for a traditional touch and serve with coffee or tea.
6. Variations:
- For a sweeter taste, brush with a honey glaze before baking.
- Try adding nutmeg or chili powder for a smoky flavor.
- Make vegan or gluten-free versions by substituting ingredients.
Enjoy your colorful, festive creation as part of your Day of the Dead celebration!
Ingredients That Make Colorful Day of the Dead Bread
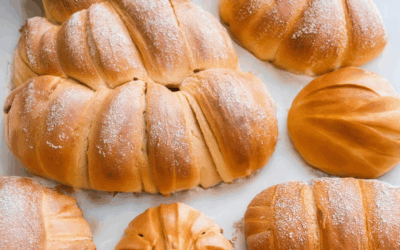
The vibrant colors of Day of the Dead bread, or Pan de Muerto, come from a blend of natural dyes and traditional ingredients. Here’s a breakdown of the key components:
- Annatto : Extracted from the annatto tree, this deep orange-red dye is a cornerstone of Pan de Muerto. It imparts a rich, traditional color associated with the holiday.
- Turmeric : Known for its yellow hue, turmeric adds brightness to the bread, complementing the earthier tones from annatto.
- Cempasúchil : A thick annatto paste used in the state of Guerrero, Mexico, it contributes a deeper red color and enhances the cultural authenticity of the bread.
- Kakawate : Another form of annatto, kakawate adds a distinct reddish-brown tint, enriching the bread’s appearance.
- Fruit Extracts : These can introduce brighter shades, offering variety in the bread’s color palette while maintaining its traditional feel.
These ingredients work together to create the iconic look of Pan de Muerto, symbolizing the cultural significance and festive spirit of Día de los Muertos.
How to Make Your Day of the Dead Bread Colorful
Transform your traditional Day of the Dead bread into a vibrant centerpiece with these creative techniques. By incorporating bold colors and artistic touches, you can elevate your bread to a memorable status.
Key Ingredients for Colorful Bread
- Marigold Extract : Use natural marigold dye or edible marigold powder for a golden-yellow hue, symbolizing life and the sun.
- Beetroot Powder : Add a vibrant purple color to reflect remembrance and deep respect for loved ones.
- Turmeric : Create a warm yellow tint reminiscent of the sun, while balancing flavor with a pinch of this spice.
- Anatto : For a rich, reddish-brown color symbolizing blood and life, use this traditional dye in small amounts.
- Fruit Juices : Mix pineapple, cranberry, or pomegranate juice for bright pink, orange, or red hues, respectively.
- Spinach
For a natural green shade, blend fresh spinach into the dough for a healthy and colorful twist.
Techniques for Achieving Vibrant Colors
- Color the Dough : Mix the chosen colorants thoroughly with the dough for even distribution. Use gloves to prevent staining your hands.
- Add Decorative Layers : After baking, brush a thin layer of colored butter or glaze over the cooled bread for a shiny finish.
- Sprinkle with Colored Sugars : Enhance the visual appeal with colorful sugar sprinkles or crystals, ensuring they complement the overall theme.
- Use Edible Glitters : Add sparkle with edible glitter or gold dust for a luxurious and festive touch.
- Decorate with Stencils : Cut out festive shapes from cardboard or use food-safe paint to create custom designs on the bread.
- Pair with Dips and Spreads : Serve the bread with vibrant-colored spreads or dips, like cherry or guava jam, to double down on the visual impact.
Cultural Significance of Colors
The Day of the Dead is deeply tied to color symbolism:
- Red : Represents joy, love, and life.
- Yellow : Symbolizes the sun and life force, often associated with marigolds.
- Green : Represents growth and rebirth.
- Purple : Reflects remembrance and deep respect.
Alternative Methods for Colorful Bread
- Liquid Food Coloring : Use high-quality liquid food dyes for precise control over shades, ideal for intricate designs.
- Natural Dyes : Experiment with plant-based dyes like elderberry or hibiscus for unique color variations.
- Colored Butter : Knead vibrant-colored butter into the dough for a creamy, colorful effect.
Presenting Your Colorful Creation
Make your bread the centerpiece of the table with these presentation ideas:
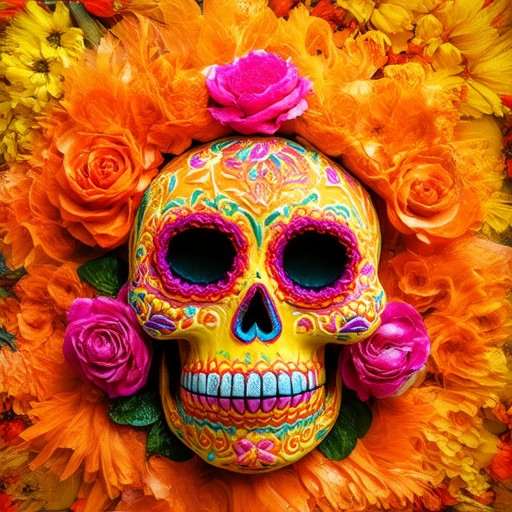
- Arrange on a Decorated Plate : Pair with traditional sugar skulls, candles, or flowers for a cohesive theme.
- Create a Bread Sculpture : Shape the dough into figures or patterns inspired by Day of the Dead imagery.
- Use seasonal Garnishes : Add fresh flowers, pumpkins, or other seasonal elements for extra flair.
By experimenting with these techniques, you can craft a Day of the Dead bread that’s as visually striking as it is delicious. Whether you prefer natural dyes or bold artificial colors, the result will be a memorable and meaningful addition to your celebration.
Traditional Methods to Prepare Colorful Day of the Dead Bread
The Day of the Dead is celebrated with vibrant traditions, and colorful bread plays a significant role in the festivities. Here are the traditional methods to prepare this iconic bread:
- Ingredients: Wheat flour, butter, sugar, active dry yeast, salt, anise seeds (optional), orange zest (optional)
- Tools Needed: Mixing bowls, wooden spoon, stand mixer with dough hooks, baking trays, comal (traditional Mexican griddle)
**Step-by-Step Preparation:**
- Gathering Ingredients: In a large bowl, combine 3 cups of all-purpose flour, 1 cup of sugar, 1 teaspoon of salt, and 1 teaspoon of anise seeds (if using). Add 1 cup of melted butter and 1 cup of warm water. Mix until a dough forms.
- Kneading the Dough: Turn the dough onto a floured surface and knead gently for about 8-10 minutes until smooth. Allow the dough to rest for 1 hour in a warm place to proof.
- Shaping the Dough: After proofing, divide the dough into 12-15 small pieces and roll each into a ball. Place them on a baking tray lined with parchment paper, cover with a damp cloth, and let them rise for another 1-2 hours.
- Coloring the Dough: To achieve vibrant colors, mix 1 tablespoon of food coloring gel or paste with 2 tablespoons of warm water. Carefully fold the colored mixture into the dough, avoiding overworking the gluten. Divide the dough into smaller portions and roll into logs or shape into rounds.
- Baking the Bread: Bake in a preheated oven at 350°F (175°C) for 20-25 minutes, or until golden brown. Remove from the oven and cool slightly before serving.
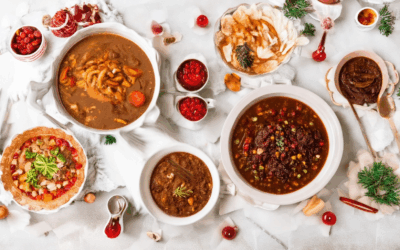
Serving Suggestions: Serve the colorful bread warm with a cup of coffee or alongside traditional Mexican desserts like pan de muerto. It pairs perfectly with hot chocolate or as a snack anytime of the day.
For more authentic recipes and baking tips, visit our pan dulce recipe page and explore our mole sauce guide . Let us help you master the art of traditional Mexican baking!
How to Make Colorful Day of the Dead Bread
Creating vibrant and colorful Day of the Dead bread is a fun and creative way to celebrate the holiday. Here are some expert tips and methods to craft beautiful bread for your Día de los Muertos celebrations:
1. Coloring the Dough
The secret to colorful bread lies in the dough itself. Use food-grade dyes or natural colorants like beetroot juice for purple, turmeric for yellow, and spinach for green. For red hues, consider using a mix of tomato paste and chili powder. Always follow safety guidelines when using dyes.
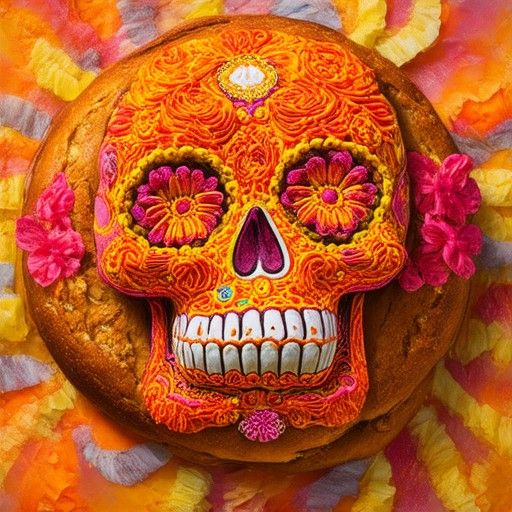
2. Shaping the Bread
Traditional shapes like pan de muerto (skeleton bread) or sugar skulls are popular choices. Use cookie cutters or molds to shape the dough. For a modern twist, try creating free-form designs or incorporating edible glitter for extra sparkle.
3. Decorating the Bread
Decorate the bread with colored sugars, sprinkles, or edible pearls for a festive look. Add details like sugar skulls, pumpkins, or flowers using frosting or royal icing. Consider using edible gold or silver dust for intricate designs.
4. Baking Techniques
Preheat your oven to 350°F (175°C) and bake the bread until golden brown, typically 20-25 minutes. For a softer texture, brush the dough with butter before baking. Let the bread cool slightly before decorating to prevent the colors from smudging.
5. Adding Flavor
Enhance the taste by incorporating traditional Mexican flavors like anise or cinnamon into the dough. For a sweeter option, drizzle the bread with honey or sprinkle with powdered sugar after baking.
Tools You’ll Need
- Bread pans or cookie sheets
- Food coloring (gel, powders, or natural ingredients)
- Cookie cutters or molds
- Sugar, sprinkles, and edible decorations
- Mixing bowls and measuring cups
By experimenting with colors, shapes, and decorations, you can create unique and eye-catching Day of the Dead bread that will impress your guests and add a magical touch to your celebration!

Understanding Why Your Day of the Dead Bread Isn’t Turning Out Colorful
Your colorful Day of the Dead bread may be turning out less vibrant than expected due to several factors. Here are some common issues and solutions to help you achieve the desired vibrant appearance:
- Insufficient Fat Content: The lack of fat, such as butter or oil, can prevent the colored powders from properly binding to the dough, leading to dull colors. Ensure your recipe includes adequate fat to help the colors adhere better.
- Incorrect Powder-to-Dough Ratio: The proportion of colored powder to dough is crucial. Too little powder may result in weak colors, while too much can lead to uneven distribution. Adjust according to your desired intensity and mix thoroughly.
- Storage Issues: Proper storage is essential. Store your dough in an airtight container to maintain moisture and prevent the powders from drying out, which can reduce their vibrancy.
- Glazing Technique: Enhance the color by applying a detailed sugar glaze before baking. Allow the glaze to set slightly for a smoother finish that complements the colored dough.
- Flour Type: Different types of flour can affect color absorption. Experiment with various flours to find which one yields the best results for your colored bread.
- Baking Temperature and Time: High heat can cause the colors to fade. Bake at the recommended temperature and keep an eye on the bread to avoid overbaking, which can dull the colors.
- Powder Quality: Invest in high-quality colored powders specifically designed for baking to ensure they release vibrant colors when mixed into your dough.
By addressing these factors and experimenting with different techniques, you should be able to achieve a more colorful and vibrant Day of the Dead bread. Happy baking!

0 Comments